

 Call
Call
 Email
Email
How to Repair Stone Window Sills

Managing Director
Lucian Ivan
• 21 minute read
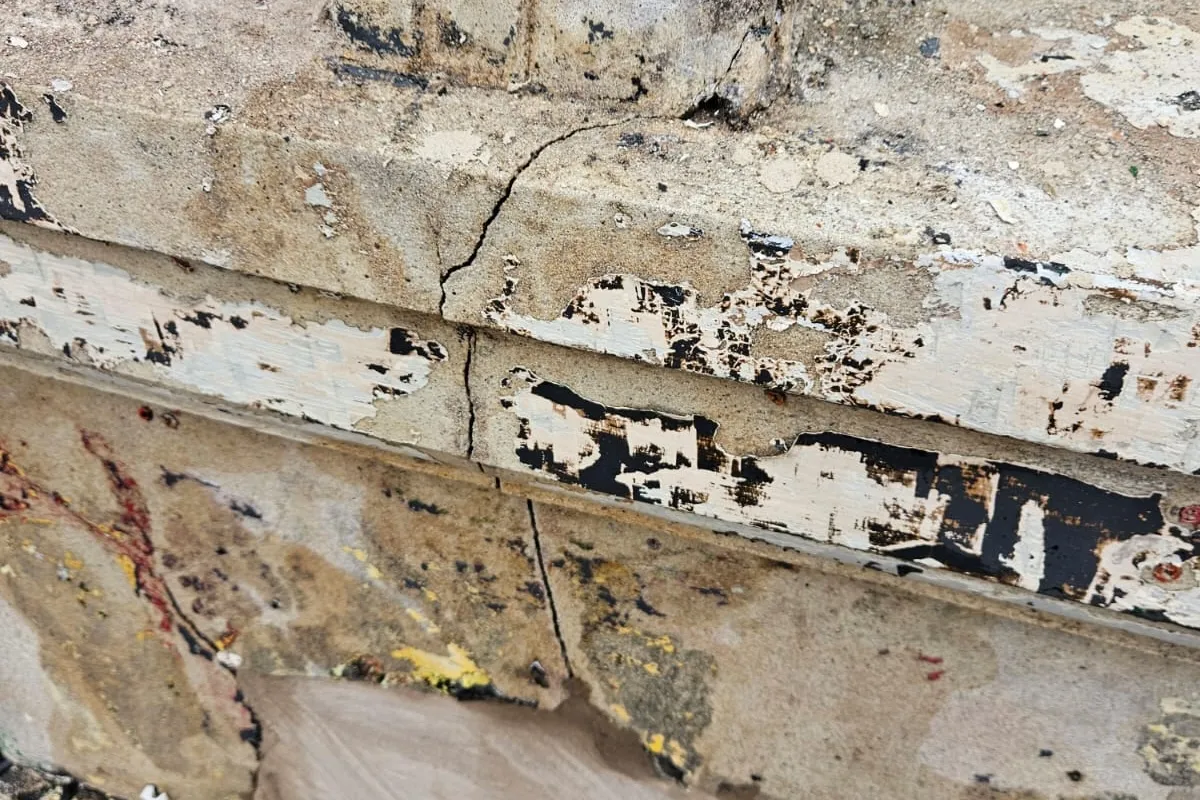
Contents
- What Is a “Stone” Window Sill?
- Why Stone Window Sills Fail
- Before You Repair Anything: The Conservation Checklist
- Is This a DIY Repair or a Specialist Job?
- How to Repair Stone Window Sills
- Need Advice on Stone Window Sill Repair?
Stone window sills can deteriorate in many different ways – sometimes gradually through weathering and moisture, or sometimes more suddenly after a hard frost, building movement or a local failure that lets water sit where it shouldn’t.
Either way, the early signs often look deceptively small: damp staining beneath a window, flaking at the front edge, draughts or fine cracking around joints.
The tricky part is that what you can see isn’t always the whole problem. A sill sits right on the frontline between the window, the wall and the weather, so defects are often tied to wider issues such as poor water run-off, open joints or past repairs that haven’t behaved well over time.
In this guide, we’ll take a practical, conservation-aware approach to stone window sill repair. That means starting with diagnosis, keeping intervention proportionate, and prioritising compatibility so repairs don’t inadvertently shift moisture and decay into surrounding masonry.
We’ll also be clear about where simple maintenance may be reasonable, or where specialist assessment is the safest, most cost-effective next step.
What Is a “Stone” Window Sill?
When people talk about a “stone” window sill, they can be referring to different things, which matters when it comes to repair.
Traditionally, a stone window sill is a solid piece of natural stone that projects from the wall beneath a window. Its job is functional as much as visual: to support the window opening, shed rainwater away from the wall and protect the masonry below.

However, not all sills that look like stone behave in the same way. In practice, you may be dealing with:
-
Natural stone sills, such as sandstone, limestone or granite are common on older and higher-value buildings.
-
Reconstituted or cast stone, made from aggregates and cement, are often used on later 20th-century properties.
-
Cementitious or concrete sills resemble stone but handle moisture very differently.
-
Applied or slip sills, where a thin stone facing is fixed over another material rather than forming a single solid piece.
These differences affect everything from how water moves through the sill, to what mortars or repair materials are compatible, and whether a repair will last or accelerate decay.
For that reason, one of the first steps in any sensible repair is simply understanding what kind of sill you’re dealing with – not all “stone” can, or should, be treated in the same way.
For the rest of this guide, we’re focusing primarily on natural stone window sills, as these are the most sensitive to moisture movement, material compatibility and inappropriate repair. Many of the principles discussed still apply more broadly, but reconstituted stone and concrete sills can tolerate different materials and methods.
Why Stone Window Sills Fail
When a stone sill starts to crack, flake or fails completely, it’s tempting to treat the damage itself. But in most cases, what you see is the result of other problems.
An understanding of the underlying causes is the key to choosing the right repair, and avoiding work that looks neat in the short term but fails again soon after.
Here are some of the most common mechanisms behind stone sill deterioration:
Poor Water Management
Any window sill needs to allow water to run off effectively. If water is allowed to sit or soak in, even for short periods, it will start to cause problems over time.
Typical triggers include:
-
Flat or back-falling sills, where water doesn’t drain away from the building.
-
Missing or ineffective drips – the groove beneath a sill that breaks surface tension.
-
Open joints around the sill, which let water into the wall below.
-
Defective gutters or downpipes, which may soak the area repeatedly.
Even small detailing issues can turn into long-term moisture exposure and that moisture is generally what enables the real damage.
Frost and Salt Crystallisation
These are decay processes, not causes on their own; but when moisture is present, you’ll often end up with:
-
Freeze-thaw cycles: When water soaks into the stone and temperatures drop, that water freezes and expands. As it thaws, it contracts again. Repeated over time, this expansion and contraction can force the outer surface of the stone to break away, particularly at the edges and corners where the material is most exposed.
-
Salt crystallisation: Dissolved salts are carried into the stone by moisture and left behind as the surface dries. As those salts crystallise, they expand within the stone’s pores, gradually breaking down the internal structure from the inside out.
These processes tend to work slowly and unevenly. At first, the damage may be barely noticeable, but over time they can hollow out the face of a sill, leaving it weaker and more vulnerable to further deterioration.
Movement in the Building
Cracks don’t always mean a major structural failure, but they do usually mean that something has moved, often caused by:
-
Seasonal or thermal movement around the window opening can open joints or crack the sill itself.
-
Minor settlement or frame movement can gradually push sills out of alignment.
-
In older buildings, embedded iron fixings may be hidden inside the stone. As the iron rusts, it expands, and that pressure can fracture the stone from within (a process called rust-jacking).
Again, this kind of deterioration may appear slowly and unevenly – a fine crack here, a chipped edge there – but the underlying forces can be difficult to predict without proper inspection.
Incompatible Past Repairs
Sadly, when it comes to stone, well-intentioned repairs are one of the most common underlying issues that we see.
In particular, cement-based mortars and dense repair compounds may look clean when first applied, but they:
-
Trap moisture in the surrounding masonry.
-
Prevent the stone from drying evenly, creating zones of higher saturation.
-
Encourage salt damage, especially if older materials are still present beneath.
-
Often remain intact while the original stone erodes around them.
This is especially common across 20th-century interventions, before many of the conservation best-practices that are used today were widely understood.
In short, stone repairs often fail not because the material was applied poorly, but because the wrong problem was addressed. Before reaching for a filler or patching mortar, it’s worth taking time to understand how water is behaving around the opening, whether the sill is drying properly, and what conditions have led to the damage.
Your investigation should come first. Repairing the stone without resolving the cause usually means doing the work twice.
Before You Repair Anything: The Conservation Checklist
Good stone repairs start with restraint, especially when it comes to heritage buildings. Before removing, replacing or tidying up a sill, it’s worth taking a moment to ask whether the work is necessary – or whether it will do more harm than good.
Here are some of the core principles that guide conservation-aware repairs:
Repair before replacement
-
Retain original stone wherever it remains sound – even if it looks weathered.
-
Don’t mistake patina for failure: surface ageing is often harmless.
-
Focus on what’s needed, not what would look neater or newer.
Minimum intervention
-
Only remove or replace what is genuinely beyond repair.
-
Avoid over-cleaning, re-profiling or “making good” for appearance alone.
-
If the building is listed or historically significant, consider consent requirements early.
Compatibility matters
-
Repair materials should be sacrificial and breathable – designed to fail before the stone does.
-
Avoid hard, cementitious mortars or rigid fillers that trap moisture in the surrounding masonry.
-
Whatever the method or materials, new work should never accelerate the decay of the surrounding stone.
You may be tempted to break these principles; in some rare cases, that might be the right choice. But, in the long-term, our experience suggests that a conservation-led approach is the best way to avoid recurrent issues or introducing new problems elsewhere.
Is This a DIY Repair or a Specialist Job?
Not every issue with a stone window sill calls for a specialist. Some minor maintenance and small repairs can be tackled by a confident, well-informed building owner – particularly where the risks are low, the access is safe and the damage is minor.
But it’s important to know where the line sits. Repairs to stone – especially on older buildings – can carry unintended consequences if materials are poorly matched or if wider defects are missed.

Here’s a rough guide:
Suitable for DIY (Small, Low-Risk Jobs)
Some tasks may be reasonable for experienced homeowners or caretakers who understand the basics of compatible materials and safe working practices:
-
Cleaning algae or soiling gently, using soft brushes and water. Avoid pressure washing, chemicals or aggressive abrasion.
-
Repointing short runs of open joints at low level, where access is easy and mortar selection and curing are well understood.
-
Very small, local mortar fills – the sort of "dentistry" work used to tidy up nibbed edges or shallow voids where no movement is present.
These are still best approached cautiously, and ideally after inspection to confirm there's no deeper issue.
Call a Specialist If You See Any of These
Even small defects may signal wider problems that need professional diagnosis, or may involve risks that aren't immediately visible.
Bring in a qualified specialist if you notice:
-
Loose or rocking stones, delamination, deep cracks or signs of structural movement.
-
Persistent damp staining, either externally or inside, especially where it’s unclear how water is getting in.
-
High-level work, where ladders feel like a stretch or where safe access hasn’t been properly planned.
-
Historically significant or listed fabric, where mistakes are expensive and potentially irreversible.
Even where the work looks simple, the real challenge is often in knowing what not to touch, as well as which seemingly minor issues are worth investigating further.
How to Repair Stone Window Sills
Stone repairs do not follow a fixed recipe – they require reading the building, understanding the problem and choosing a method that’s appropriate for the material and context.
This section isn’t intended to teach the craft of stone repair in full. That takes training, experience and often a deeper understanding of how buildings behave over time. But for building owners, facilities teams and others managing older fabric, what follows can offer a useful guide: a way to understand the sequence, spot common pitfalls and assess whether the work in front of you matches best practice.
We’ll begin with the groundwork: assessment, planning and preparation. Then, we’ll walk through a series of common repair situations based on what you can actually see on site, with a clear focus on matching the repair to the problem.
Before You Start: Diagnosis and Preparation
Before any tools come out, take time to inspect the area closely. The aim isn’t just to confirm that something’s damaged, but to understand why, and whether intervening will genuinely improve the condition or simply mask a deeper issue.
Here are the basic steps to take before beginning any repair work:
-
Diagnose the cause before treating the damage
Look beyond the stone itself: a repair that looks sound may fail quickly if the underlying issue hasn’t been resolved. Step back and think systemically – what’s driving the decay? Are issues localised or part of a wider pattern? What about other similar windows – are they likely to fail similarly? -
Check for obvious sources of water above or around the window
Look at gutters, drips, joints and detailing. A small stain or crack may be the end point of a much broader water management problem. -
Inspect the sill closely
Is there movement, cracking, loose material or visible damp? Tap gently to check for hollow-sounding areas or delaminated sections. Is the stone failing from within, or are previous repairs breaking down? -
Avoid unnecessary removal
Sound stone and original mortar should be left in place wherever possible. Over-intervention often creates more problems than it solves, as well as potentially altering the character of the building. -
Be clear about the limits of DIY or basic maintenance
If you’re unsure of the cause, or if the damage involves structure, movement or access issues, don’t proceed alone. -
Make sure the repair is safe, proportionate and likely to last
Don’t improvise. Match materials carefully, plan your work in manageable stages and think about how the repair will behave over time. -
Think through safety and access
Avoid working from ladders where stability is a concern, and never carry out repairs over occupied areas without appropriate protection below. -
Protect surrounding elements
Before hands-on work begins, ensure that window frames, wall finishes and ground-level surfaces are protected from accidental damage. Stone repairs don’t have to be messy, but they do need containment.
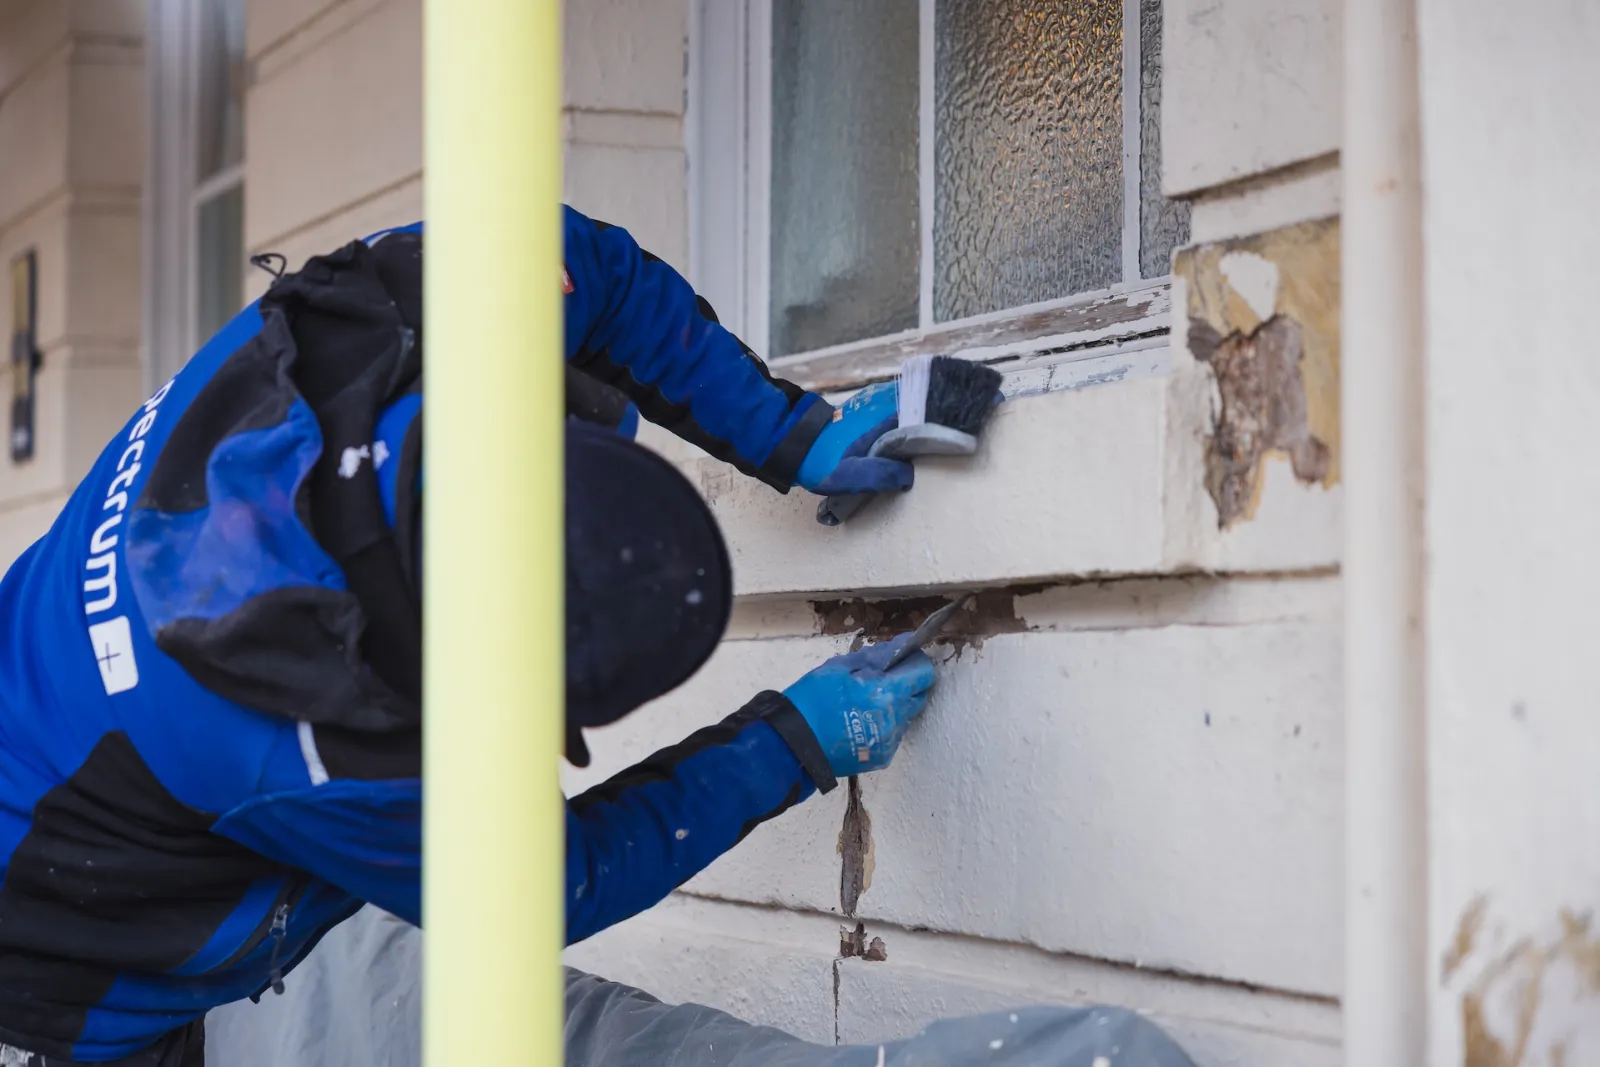
Common Repairs
With that in place, you’re ready to get started.
What follows isn’t a full manual – we can’t cover every detail of stone repair in one article. Instead, we’ve taken a problem-led approach based on common visible issues: cracks, flaking, damp, missing mortar and so on.
These high-level steps are designed to help you get your bearings: to understand what might be going wrong, what a suitable repair could involve, and where further research or professional input may be needed to deal with the specific challenges of your building and materials.
For example, lime mortars are generally the most compatible choice for traditional masonry, but they still need to be matched to the stone and exposure. Some sandstones are not tolerant of lime, and overly strong hydraulic limes can be harder and less forgiving than the surrounding masonry. It’s worth checking what the building used originally, or getting a mortar specified or analysed as required.
The joints around my stone sill are cracked or missing
Open joints are one of the most common ways water gets into a wall. Once moisture bypasses the protective slope of the sill, it can soak into the masonry below, leading to damp, decay or deeper stone damage.
In some cases, failed joints are just the result of age and weathering. In others, they’re a sign of movement around the window, poor water management or hard cement mortars breaking away from softer stone. Whatever the cause, a careful small-scale repointing repair can often put things right, if done well.
A typical repair might include:
-
Inspect the surrounding area carefully
Look for signs of damp, movement or staining around the opening, especially at the corners or underneath. Again, a failed joint might be the symptom, not the cause. -
Check how water behaves
Use a hose or watering can (lightly) if needed. Watch where water runs and where it sits. If it soaks into the wall below the sill, there's likely a gap that needs attention, but it may not be the only one. -
Rake out loose joint material by hand
Use a blunt jointing tool or small chisel. Try to avoid grinders, as they can damage the stone edge and widen the joint unnecessarily. -
Brush and dampen the joint
Clear dust, debris or old pointing fragments. Lightly mist the joint before repointing to stop the mortar drying too fast. -
Apply a breathable, compatible mortar
Use a lime-based mortar that is slightly softer than the stone, pressed firmly into the joint to ensure good contact. The right mortar is not simply for aesthetics – it avoids trapping moisture and causing fresh damage. -
Tool the joint modestly
Finish just proud of the surface, then brush back slightly once the mortar has begun to firm up. Don’t overwork it – subtle, tidy joints age best -
Protect the area while curing
Protect the area from direct sun, wind, rain or frost as the mortar cures – usually for several days. Don’t seal or coat the repair – the joint needs to breathe and weather in naturally.
The edge of the stone sill is chipped or crumbling
The edges and corners of sills are often the first places to show wear because they are most exposed to weather and impact.
Not all loss needs repair: minor, rounded erosion that doesn’t affect the performance of the sill can be left alone and often looks more appropriate with age. In traditional masonry practice, unnecessary intervention is avoided because it may do more harm than good.
When the loss is deep enough that water is no longer shed cleanly, or when it begins to undermine the sill’s ability to protect the wall below, a small repair may be appropriate. In such cases, a careful fill with a compatible repair mortar – softer and more permeable than the stone itself – is typically used.
A typical small‑scale repair might include:
-
Assess the damage objectively
Judge whether the chipped or crumbling edge is affecting water run‑off or accelerating decay. Minor surface wear is often best left alone. -
Remove loose or friable fragments
Use small hand tools and gentle brushing. Do not undercut or widen sound material unnecessarily. -
Clean and pre‑dampen the repair zone
Brush out dust and dirt, then lightly dampen the area so that the repair mortar will bond without drying too rapidly. -
Apply a compatible lime‑based mortar in layers
Build the repair up gradually using a mix that is breathable and slightly weaker than the stone. This helps accommodate moisture movement and avoids trapping water behind the repair. -
Form the repair with restraint
Shape the new material to follow the existing profile. For very small areas, this may be done freehand. For larger fills, use a simple wooden or foam shuttering to support the mortar until it stiffens. -
Protect while curing
Shield the area from direct sun, wind, heavy rain or frost for several days. Do not seal or paint the repair – it should weather in naturally.
Small chips at edges or corners can often be carefully repaired using appropriate lime mortar. But if a larger portion of the corner is missing – say, deeper than around 15mm – the repair may need shuttering or internal support from a non-corroding armature to hold its shape.
Likewise, if the original profile is shaped, detailed or particularly prominent, accurate reinstatement goes beyond basic repair techniques.
In these cases, a professional stonemason will help ensure the work is structurally sound, visually appropriate and long-lasting.
The surface of the stone is flaking or breaking away
When stone sheds thin layers or sheets rather than cracking in a single line, that’s often described as flaking or spalling. Visually, it may resemble peeling paint or thin scales detaching from the face.
This behaviour is common on softer sedimentary stones (like sandstone and some limestones), but it can occur in many materials when moisture repeatedly enters pores and then changes state or carries salts.
It’s not just an aesthetic issue: continued loss of surface material gradually exposes fresher stone to the elements, speeding further decay. A careful, minimal intervention can sometimes help stabilise the surface and reduce further damage.
-
Assess the area first
Look at the wider picture: is water draining properly? Are joints nearby open? Is this localised flaking or is it part of a pattern? Flaking is generally a symptom rather than the root cause. -
Gently remove loose or detached flakes
Use soft brushes or small wooden tools. Don’t force off anything that’s still sound, even if it looks weathered. -
Judge whether a mortar fill is appropriate
If the loss leaves a small depression that risks holding water, a carefully recessed lime mortar fill may help shed moisture. Don’t try to bring it flush unless needed – a slightly underbuilt finish often looks more appropriate and avoids sharp edges that stand out or weather poorly. -
Fill voids or gaps with the right mortar
Use a compatible lime-based mortar that’s softer and more porous than the stone – don’t use a cement mortar. Ideally, the mix should match in tone and texture, but it must remain sacrificial over time. Avoid additives, dense aggregates or anything that seals the surface. -
Protect the area while curing
Shield the repair from wind, rain or frost for several days. Don’t coat or seal the surface – repairs should remain breathable.
If flaking is widespread, recurring or affects particularly soft or carved stone, expert help may be needed. In some cases, a conservation mason may use specialist mortars, consolidants or consider partial stone replacement, especially where the surface is too friable to take a standard repair.
And remember, surface loss is often just the symptom. A successful, long-lasting repair starts with managing moisture, not just filling gaps.
There’s a crack across the stone sill
Cracks in stone window sills are always worth a second look. While some are harmless surface fissures that have weathered in over time, others may signal deeper issues like structural movement or uneven loading around the window.
Sills are particularly vulnerable at junctions with window frames, corners or embedded metalwork. Over the years, even minor movement – thermal expansion, seasonal drying, shifting lintels or local settlement – can lead to fine cracks that gradually widen. Sometimes, what looks like a crack may even be a failed joint or a past repair breaking down.
The right response depends not just on the appearance of the crack, but on what’s causing it.
A typical approach might include:
-
Inspect the crack carefully
Is it straight or stepped? Does it taper or widen? Is there visible displacement on either side? These clues can help you understand whether it’s a historic settlement crack or something active. -
Check for wider signs of movement
Look at the surrounding masonry: are there other cracks above or below the opening? Are lintels level and intact? Any signs of frame distortion or recent pointing around the crack? These can indicate more significant instability. -
Use a monitoring method if unsure
Apply a tell-tale across the crack (a thin strip of lime putty, glass slide or another simple marker) and check it over a few weeks or months. If movement continues, avoid repair until the cause is resolved. -
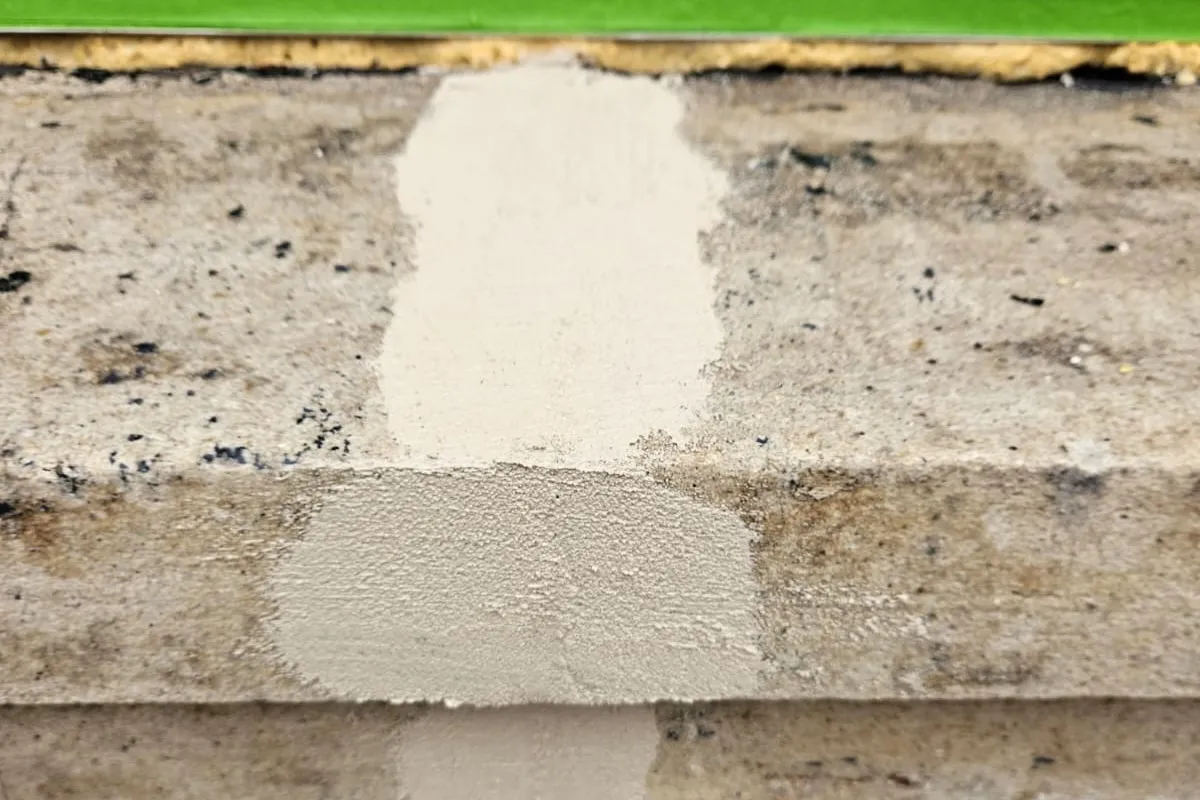
For stable cracks, consider a light mortar fill
If the crack is small, dry, and not showing signs of movement, a minimal fill may be appropriate to reduce water ingress or visual impact. Use a breathable lime-based mortar, slightly softer than the stone, and apply with care. -
Don’t fill and forget
Injecting mortar into a live crack may hold temporarily but risks masking serious structural problems. Revisit the area after wet weather or seasonal change. A crack that repeatedly reopens is a sign that deeper issues need attention.
If the crack:
-
Crosses through multiple stones
-
Is especially wide, deep or spans a large section of the sill
-
Shows signs of recent movement or widening
-
Coincides with displaced or loose stonework
-
Appears alongside rust staining
It’s best to involve a conservation-aware restoration specialist. In some cases, the solution may involve stitching, indents, replacement or structural repair – not just patching.
Water sits on the sill or runs back towards the window
A stone sill is not just decorative – it plays a vital role in shedding water away from the wall. If water sits on the surface or runs back toward the frame or into the wall below, it compromises both the sill and the surrounding masonry.
This kind of failure can lead to dark staining below the sill, algae growth, blown plaster inside, or frost damage and flaking on the stone itself. The cause is usually simple: a blocked drip groove, a flat or back-falling sill, or old patch repairs that have altered the original profile.
A standard repair might include:
-
Check the fall of the sill
Using a small level or simply observing how water behaves in light rain, check that the sill slopes outward slightly. Even a shallow fall (about 1:40 or 1:50) is usually enough to move water clear. -
Inspect the drip groove
Underneath most stone sills is a small channel around 5 and 20 mm away from the front edge (the "drip") that breaks the surface tension and ensures water drops clear of the wall. If it’s blocked, filled in or missing altogether, water may run back toward the window or soak the masonry below. -
Look for signs of past repair
Cementitious mortars or patching can sometimes distort the original profile of the sill, creating flat spots or unintended back-falls. In these cases, the function may have been lost even if the repair looks decent. -
Clear blockages and address simple defects first
Where water is pooling due to moss, debris or algae, a gentle stone clean may restore normal function. Avoid aggressive scraping or jet washing. -
Reform the fall if needed
If the stone is sound but the fall is insufficient, a new surface profile can sometimes be built up with a carefully bonded, breathable lime-based repair mortar. This should be done with care – too much build-up can look clumsy or fail prematurely. -
Don’t sacrifice function for appearance
Restoring the shed is more important than replicating every curve or profile. Aim for discreet, well-integrated work that protects the building.
Need Advice on Stone Window Sill Repair?
Damage to stone window sills is deceptively tricky. What looks like a simple crack, stain or flake can be the surface expression of a more complex moisture, movement or material issue – and the wrong repair can be costly, ineffective, or even accelerate decay.
You don’t have to decide what to do from a photo or guess at whether a DIY fix is sufficient.
At Spectrum Specialist Support, we start with thorough diagnosis and tailor our approach with care. Our expert stonemasons will assess your situation in context – considering the stone type, building age and significance, moisture behaviour and access constraints – to help you determine the most appropriate intervention.
We combine practical conservation expertise, precision techniques such as stone colour matching and bespoke repair design, and innovative scaffold‑free access for even hard‑to‑reach sills to ensure long‑lasting results that respect the unique character of your building.
Get in touch to discuss your requirements, or read more about our approach to stone repair and broader stone restoration.
Your Building Deserves Thoughtful, Expert Care
Ensure your building remains in top condition with Spectrum Specialist Support. Our expert team offers a full range of exterior maintenance services, from external cleaning and repairs to comprehensive restoration of brick, render, stone and other substrates.
With an IRATA-certified team of abseilers and experience across hundreds of varied projects, we’ll find an access solution that saves you time and money, even on the most complex elevations.
Whether you need emergency maintenance or a tailored service plan, we are here to help. Contact us directly on 020 3551 6206 or email us at info@spectrumss.co.uk to discuss your requirements and receive a free consultation and quote.